Guide Coding
Claude Code: a complete guide, from zero to a serious workflow
Install Claude Code on Windows, Mac or Linux, run your first session and set up a serious workflow with permissions, CLAUDE.md, skills and subagents.
Tested on October 16, 2026 in Claude Code 2.1.283 · Windows Server 2022 (daily use). Native install on Windows with Git for Windows. We haven't tested it on Mac or Linux: for those we follow the official documentation. How we test

In this article
- What Claude Code is and how it differs from the chat
- What you need and how much it costs
- Installing Claude Code on Windows, Mac and Linux
- Your first session, step by step
- Permission modes: the setting that matters most
- CLAUDE.md: the manual it reads every time
- Commands and shortcuts we actually use
- MCP: connecting it to your tools
- Skills: teaching it a procedure once
- Subagents: keeping the main session from filling up
- How to write a good task
- Mistakes we made and how to avoid them
- What to do now
Claude Code is Anthropic’s coding agent: you open it in a folder, ask for something in plain language, and it reads the code, edits files, runs commands and checks the result, asking for your permission depending on the mode you choose. To use it you need a paid Claude plan (from $20 a month) or an API account, and it installs with a single command on Windows, Mac or Linux.
In this guide you’ll find the current installation method, your first session step by step, the permission modes, the commands we actually use, and how to go from “trying it out” to working with it every day. We tell it from our own experience: at GamzyHost we use it daily as the engine behind Jarvis, an in-house assistant that runs on a VPS with Windows Server 2022.
What Claude Code is and how it differs from the chat
In the Claude chat, you are the hands: you copy the error, paste the code, copy the answer and carry it over to your editor. In Claude Code, the model has tools. It can open any file in the folder, search the whole project, edit, run the tests and read what they return. You say what you want and review.
The practical difference is the loop. An agent doesn’t answer once: it reads, decides, acts, looks at what happened and starts again until it’s satisfied or needs to ask you something.
Claude Code isn’t just the terminal. The official documentation also offers it as a VS Code extension, a JetBrains plugin, a desktop app and in the browser (claude.ai/code). They all use the same engine, so your CLAUDE.md files, settings and MCP servers work in all of them. This guide focuses on the terminal, which is what we use and the most complete surface.
What you need and how much it costs
Official requirements, checked on October 16, 2026:
- System: macOS 13 or later, Windows 10 1809+ or Windows Server 2019+, Ubuntu 20.04+, Debian 10+ or Alpine 3.19+.
- Machine: 4 GB of RAM or more, x64 or ARM64 processor, internet connection.
- Terminal: Bash, Zsh, PowerShell or CMD.
- Account: Pro, Max, Team, Enterprise or a Console (API) account. The free claude.ai plan doesn’t include Claude Code.
| Plan | Price | Claude Code |
|---|---|---|
| Free | $0 | No |
| Pro | $20 a month ($17 a month if you pay yearly) | Yes |
| Max 5x | $100 a month | Yes, with 5 times Pro’s usage per 5-hour session |
| Max 20x | $200 a month | Yes, with 20 times Pro’s usage per 5-hour session |
| Team (standard seat) | $25 per seat a month ($20 on annual billing) | Yes |
| Team (premium seat) | $125 per seat a month ($100 on annual billing) | Yes |
| API (Console) | Pay as you go | Yes |
Our take: start with Pro. If in a normal week you hit the limit almost daily and it cuts your work short, move up to Max 5x. Max 20x makes sense when you run long sessions in parallel or have an agent working on its own for many hours, like our Jarvis. Prices change and there are nuances (taxes, pricing in the mobile app): we cover them in detail in the Claude pricing guide.
Installing Claude Code on Windows, Mac and Linux
The recommended method today is the native installer. You don’t need Node.js and it updates itself in the background. The npm package still exists, but the documentation treats it as an advanced option.
Windows (what we use)
- Open PowerShell (the prompt starts with
PS C:\). You don’t need to be an administrator. - Run:
irm https://claude.ai/install.ps1 | iex- The installer doesn’t show progress while it downloads. When it finishes, open a new terminal and check:
claude --versionOn our VPS it returns 2.1.283 (Claude Code) and the executable ends up in C:\Users\<usuario>\.local\bin\claude.exe. If it says claude isn’t recognized, that folder isn’t on your PATH: open another terminal or check the official installation troubleshooting guide.
If you use CMD instead of PowerShell, the command is different:
curl -fsSL https://claude.ai/install.cmd -o install.cmd && install.cmd && del install.cmdThere’s also winget install Anthropic.ClaudeCode, but that route doesn’t update itself.
Mac and Linux (not tested by us)
We haven’t installed it on Mac or Linux. According to the official documentation, on macOS, Linux and WSL the command is:
curl -fsSL https://claude.ai/install.sh | bashOn Mac there’s also brew install --cask claude-code (stable channel, no automatic updates; you update it with brew upgrade claude-code). On Debian, Ubuntu, Fedora, RHEL and Alpine there are signed repositories for apt, dnf and apk.
Checking and updating
| To | Command |
|---|---|
| See the version | claude --version |
| Diagnose the installation and settings | claude doctor |
| Update now, without waiting | claude update |
| See MCP servers and whether they connect | claude mcp list |
Your first session, step by step
- Go into the project folder and start it:
cd mi-proyecto
claude
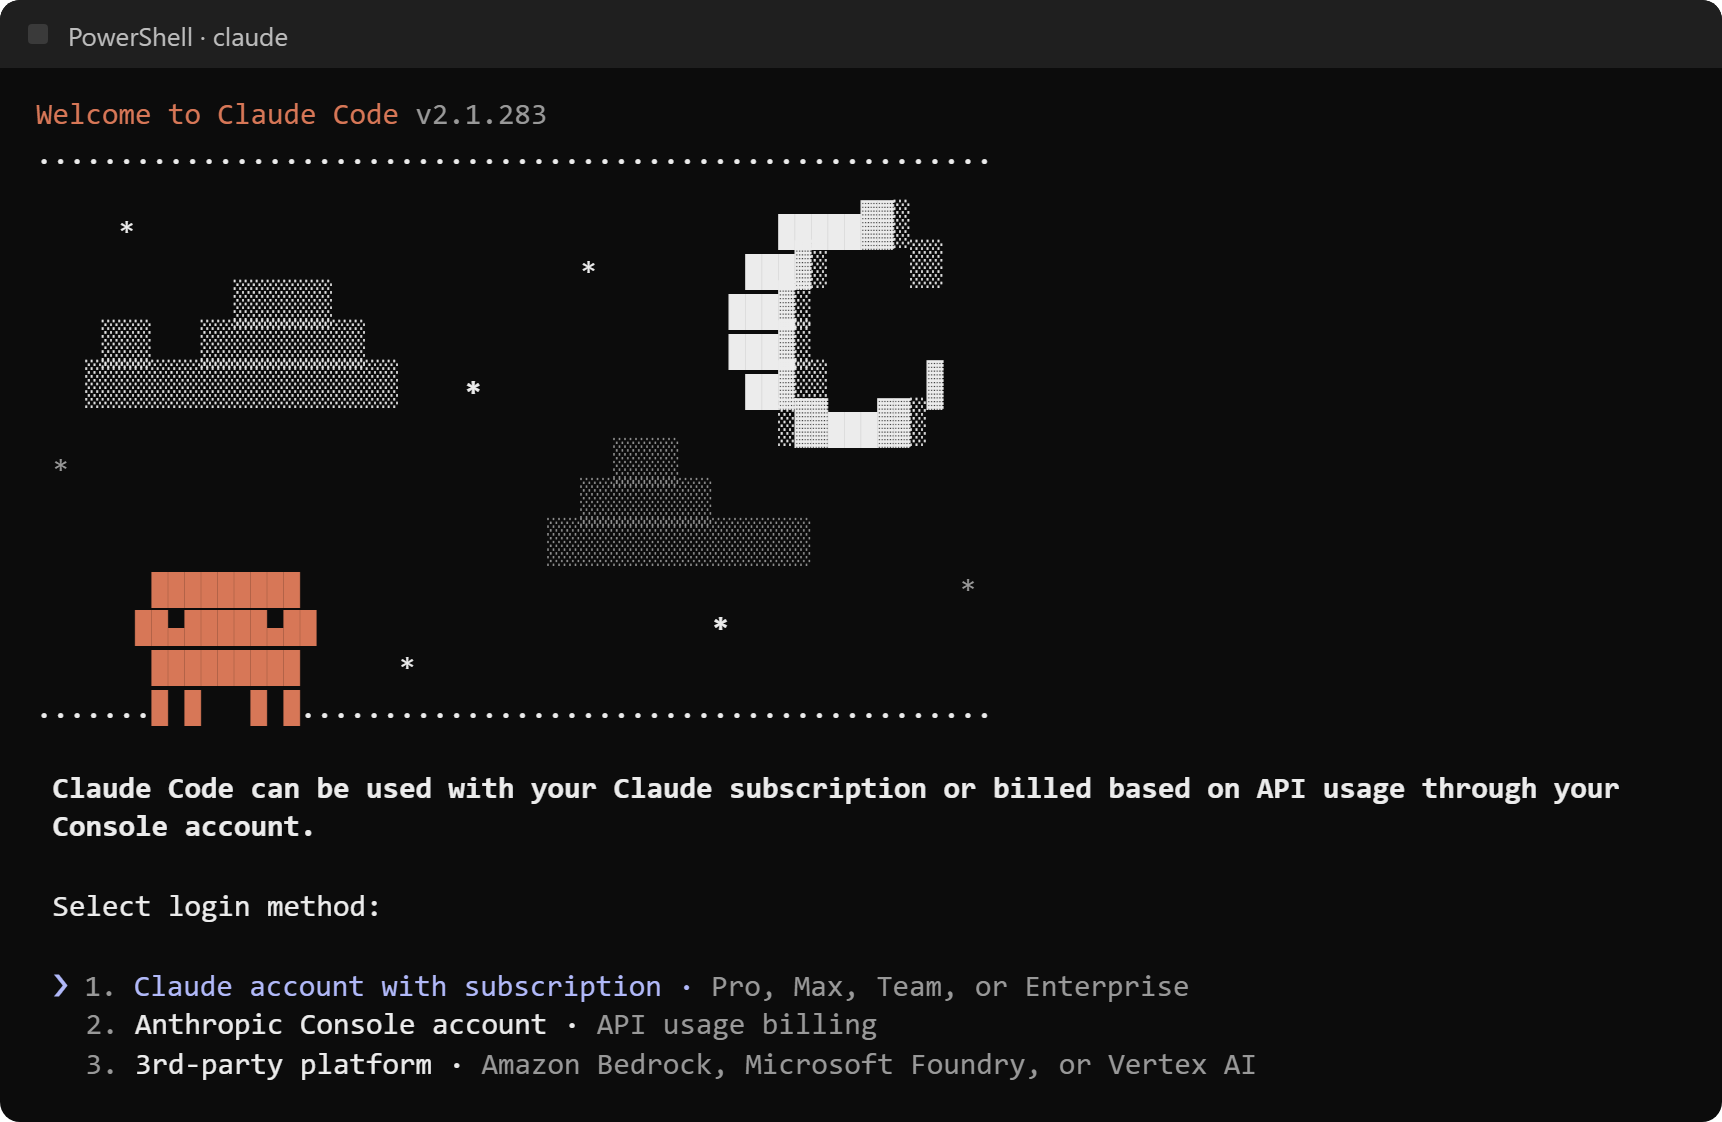
The first time, it asks you to pick a color theme and then a login method. With a subscription (Pro, Max, Team or Enterprise), choose the first option and finish signing in in the browser.
-
Ask it to explain the project before touching anything. For example: “Explain what this project does, how to start it and where the tests are.” That way you see how it reads and whether it understands the structure.
-
Generate the
CLAUDE.mdwith/init. It creates a file with what it has understood about the project, which it will read at the start of every session. Review it and fix anything that’s wrong: it’s your manual for it. -
Make a small, verifiable change. “Add a validation so the email can’t be empty in the signup form, with its test, and run the tests.” Small, and with a clear way to tell whether it worked.
-
Review what it did. Press
Ctrl+Oto see the details of every tool it used. If you don’t like something, pressingEsctwice with the input empty opens the menu to rewind code and conversation to an earlier point. -
Close or clear.
/clearstarts a new conversation with an empty context.claude -cin the terminal resumes the last conversation in that folder.
Permission modes: the setting that matters most
The permission mode decides what Claude does without asking you. It’s the first thing worth understanding, because it’s the difference between an agent that interrupts you every ten seconds and one that can break something without you noticing.
| Mode | What it does without asking | What for |
|---|---|---|
default (shown as “manual”) | Only read | Delicate work, code you don’t know |
acceptEdits | Read, edit files and basic file commands (mkdir, mv, cp…) | Iterating on code you’re reviewing as you go |
plan | Read and investigate; doesn’t edit until you approve the plan | Exploring before changing anything |
auto | Everything, with a second model (classifier) reviewing each action | Long tasks where you trust the direction |
dontAsk | Only what you’ve pre-approved; everything else is denied | Scripts and continuous integration |
bypassPermissions | Everything, with no checks | Only isolated containers or virtual machines |
You switch during the session with Shift+Tab (it cycles through manual, acceptEdits and plan, plus auto if available) or at startup with claude --permission-mode plan. The status bar always tells you which one you’re in.
A detail that changes the experience a lot: according to the official documentation, since version 2.1.283 interactive terminal and VS Code sessions start in auto mode on all plans. According to the same documentation, the classifier blocks things like production deployments, git push --force, git reset --hard, deleting files that existed before the session, or downloading and running code with curl | bash by default. The documentation itself warns that it reduces prompts but doesn’t guarantee safety.
How we use it:
- Local code in a folder with a backup or with git:
autooracceptEdits. If something goes wrong, you rewind. - When I’m not sure what I want:
plan. It brings me a plan, I correct it and only then does it edit. - Production servers: here the mode isn’t enough. Jarvis has its own approval layer: it can look around over SSH, but any change on a production Linux server reaches Ferran as a ticket with approve or deny buttons. We explain it in automating servers with AI.
bypassPermissions: never outside a disposable machine.
On top of the modes you can set fixed rules with /permissions: always allow npm test, always ask before git push, forbid reading a certain folder. Deny rules are respected in every mode.
CLAUDE.md: the manual it reads every time
Every session starts with a blank memory. CLAUDE.md is what fills it: instructions Claude Code loads at startup. Those in the folders above where you open it are all loaded, and those in subfolders are loaded when it works in them. The documentation recommends keeping each one under 200 lines: long files use up context and are followed less reliably.
We use them in layers. C:\Proyectos\CLAUDE.md holds the rules for all projects (“no git push, deployments or server changes without a ticket,” “never write secrets in files or notes”). Each area has its own (C:\Proyectos\Otros\CLAUDE.md says which projects live in it). And each project has its own with the stack, the commands and what’s off-limits. Wherever you open Claude, it gets all three layers.
How to write a good one, with real examples and templates to copy, is in the CLAUDE.md guide.
Commands and shortcuts we actually use
Claude Code has dozens of commands (type / to see them). These are the ones that come up in our daily work:
| Command or shortcut | What we use it for |
|---|---|
Esc | Stop it midway to correct course. It doesn’t lose what it’s done |
Esc Esc (empty input) or /rewind | Go back to an earlier point in code and conversation |
Shift+Tab | Switch permission mode |
/plan | Enter plan mode with a task: /plan fix the login |
/init | Create a project’s CLAUDE.md |
/clear | New conversation with an empty context when switching tasks |
/compact | Summarize the conversation to free up context without starting over |
/context | See what’s taking up context (files, tools, memory) |
/usage | See the session’s usage and how much of your plan is left |
/model | Switch models |
/resume or claude -c | Resume a previous conversation |
/mcp | View and reconnect MCP servers |
/skills | View available skills |
/permissions | Fixed allow, ask or deny rules |
@ | Mention a file with autocomplete |
! at the start | Run a command yourself and let Claude see the output |
Ctrl+O | See the details of what each tool did |
Ctrl+B | Send a slow command or agent to the background |
Alt+V (Windows) | Paste a screenshot |
\ + Enter or Ctrl+J | Write on multiple lines |
MCP: connecting it to your tools
MCP (Model Context Protocol) is the standard Claude Code uses to talk to external tools: a database, a browser, your hosting panel. Each MCP server adds new tools to it.
claude mcp add --transport http mi-servidor https://ejemplo.com/mcp
claude mcp list
In our case, Jarvis uses five: one for memory and calendar (its Obsidian vault), one with the business tools (support, email, billing), a custom one for GamzyCloud (creating websites, deploying, viewing logs), Playwright to drive a browser, and one for the Windows desktop. What MCP is, how it works under the hood and how to build one: what is MCP.
Skills: teaching it a procedure once
A skill is a folder with a SKILL.md: instructions for a specific task, with a description that tells Claude when to use it. Personal ones go in ~/.claude/skills/<nombre>/SKILL.md and project ones in .claude/skills/. While they’re not in use, only the description takes up context, so you can have lots of them.
We have 49. For example, estado-de-los-nodos explains which tool to call to check the game nodes, which thresholds are a concern (disk above 85%, 15-minute load above the number of cores) and how to summarize it in two sentences. When Ferran asks “how are the nodes doing?”, Claude loads that skill on its own. You can also run them manually with /nombre-de-la-skill. How to create your own: Claude skills.
Subagents: keeping the main session from filling up
A subagent is another Claude with its own context that the main session hands a task to. It does the work and returns only a summary. It’s mainly useful for noisy work: going through a hundred files, reading long documentation, reviewing logs.
Claude Code ships with three built in: Explore (searches the code, read-only), Plan (investigates in plan mode, read-only) and a general-purpose one that can read and edit. Your own are defined as Markdown files in .claude/agents/ (per project) or ~/.claude/agents/ (for all projects), with a name, a description and, optionally, the tools and model it can use:
---
name: revisor
description: Reviews a change looking for bugs and risks. Use it before calling something done.
tools: Read, Glob, Grep
model: sonnet
---

Review the change you're pointed to. Return only real bugs, with file and line.
Two things to know. Subagents draw from the same usage limit as your conversation. And you don’t have to ask for them: if the task is big, Claude launches them on its own; if you want to force it, tell it (“investigate this with a subagent and bring me only the conclusion”).
How to write a good task
The quality of the result depends mostly on how you ask. The tasks we give Jarvis follow this shape:
Goal: what you want to exist when it's done (not how to do it).
Where: folder or files. What it must not touch.
Context: what isn't in the code (why, for whom, what's already been tried).
How to check: the test, the build or what should be visible if it worked.
Limits: no push, no deploying, no installing anything, no touching production.
What to return: a short summary of what was done, what wasn't, and open questions.
The three lines that change the result the most:
- How to check. An agent with a way to verify its work (a test, an
npm run build, a URL that should respond) corrects itself. Without one, it tells you “done” and you’re left to discover the bug yourself. - The limits. “Don’t deploy” written in the task is worth more than trusting it won’t. In our global
CLAUDE.mdit’s there by default so we don’t have to repeat it. - What to return. If you don’t say, it will write you a long report. Ask for format and length.
If the task is big or ambiguous, start in plan mode: you give it the goal, it proposes steps, you correct the plan (much cheaper than correcting code) and then you approve it for execution.
Mistakes we made and how to avoid them
Other practices we follow and why:
- Everything it learns goes into its
CLAUDE.md. Every time a session discovers something technical that was hard to figure out (a test that only fails under a certain condition, a command that doesn’t work on this machine), it writes it down in one line in the project’sCLAUDE.md. The next session doesn’t rediscover it. - On Windows,
.ps1files in ASCII. PowerShell 5.1, the one that ships with Windows Server 2022, misreads accented characters in a script if the file doesn’t have the encoding it expects. We wrote it down inCLAUDE.mdso Claude doesn’t use them. - Never edit what’s published. Jarvis’s code is changed in its repository and published with a script that runs the tests; the production folder is never touched by hand. That way, if Claude makes a mistake, the bug stays in the repository and doesn’t reach production.
- No secrets in files or notes. Keys live in environment files outside the repository, and the rule is in the first
CLAUDE.mdlayer. - Ask for small changes. A task that touches twenty files is hard to review. Two tasks of ten each are easier to review and easier to undo.
What to do now
- Install Claude Code with your system’s command and check
claude --version. - Open it in a small project you have in git, ask it to explain it and run
/init. - Give it a first task using the template above, with a “how to check” line.
- Write your first serious
CLAUDE.mdwith the CLAUDE.md guide. - When you repeat a procedure for the third time, turn it into a skill: Claude skills.
- If you want to go beyond coding, see how we built a full assistant on top of Claude Code in your own AI assistant, and more real cases in AI agent examples.